Ribbon Shirt
by Jerry Smith
originally
published as CIHA Indian Craft Series No. 1013
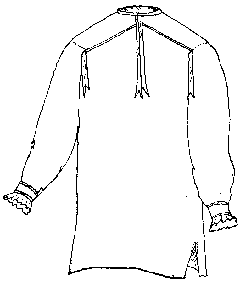
The following instructions for a “Ribbon Shirt” will be useful for both Feather Dancers and Straight Dancers. Feather dancers will want to leave off the ruffle cuff and make it tighter fitting and a little shorter. Straight dancers be sure it hangs to the crotch.
Cotton, taffeta, rayon, brocades, and many other materials may be used in making this shirt. Since the dancer usually wears a different shirt at each dance of a powwow or war dance, he may own six or more shirts in various solid colors, paisley prints, polka dots, and stripes. The color of the ribbon trim chosen for the yoke, neck opening, and the cuffs contrasts or picks up an accent color of the shirt material. Shirts are always cleaned and pressed before each powwow to give that immaculate appearance.
The following instructions will assist in the construction of one popular style of shirt. The measurements for shirt length, sleeve length, and the cuffs may have to be adjusted for some individuals.
Construction: To make a shirt, three yards of at least 45” wide material are needed. Complete the shirt as follows:
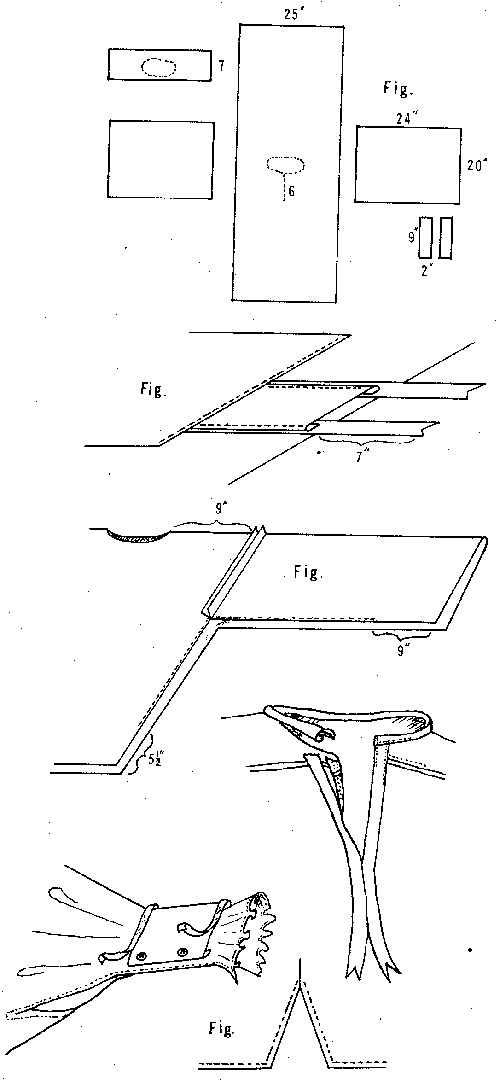
- Cut out the shirt using dimensions in Fig. 1
- Sew yoke in place leaving a ¼" of the 5/8" yoke ribbin showing, Fig. 2
- Sew sleeves in place, but remember to fold excess ribbons under so that they show on the finished product.
- Seam up sides and sleeves leaving 9” for the sleeve opening and 5½” for the side slit, Fig.3.
- Hem side slit and sleeve opening, then hem bottom of shirt and end of cuff, Fig. 4.
- Pleat or ruffle ends of sleeves. Then sew on cuff and two or three ¼" cuff ribbons. Complete cuffs with buttons or snaps. Cuffs should fit snugly around the wrists.
- Cut out neck hole and neck opening. Fold back neck opening slightly and face with two 12” pieces of 1” wide ribbon.
- Bind the neck hole and add hook and eye at the top of neck opening.


Pattern, Cherokee Man's Ribbon Shirt
Pattern, Child's Ribbon Shirt
Pattern, Ribbon Shirt
Copyright © California Indian Hobbyist Association & Jerry Smith
Copyright © 2003-2019 Matoska Trading Company Inc